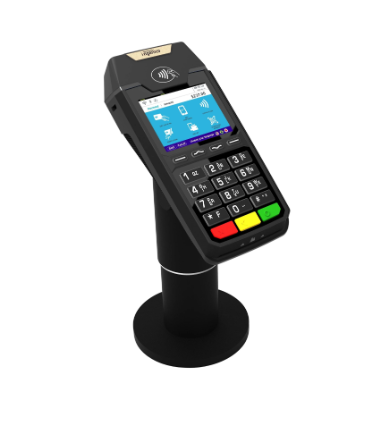
For any business accepting card payments, having a reliable and secure point-of-sale solution is essential. The Ingenico credit card terminal is a popular choice among retailers, restaurants, and service providers due to its robust security, multiple connectivity options, and ease of use. However, first-time users may find the setup and activation process a bit daunting.
This guide will walk you through the step-by-step setup and activation process for your Ingenico credit card terminal to ensure you’re ready to accept payments quickly and efficiently.
What Is an Ingenico Credit Card Terminal?
Before diving into setup, it’s helpful to understand what you’re working with. Ingenico credit card terminals are payment processing devices that support a variety of card types, including EMV chip cards, magnetic stripe cards, and contactless payments like Apple Pay and Google Pay. Popular models include the Ingenico iCT220, iWL250, Move/5000, and Lane/7000.
These terminals can function as standalone units or integrate with point-of-sale (POS) systems. Their secure encryption protocols make them a preferred choice for businesses concerned with PCI compliance.
Unboxing and Preparing Your Terminal
When you receive your Ingenico card reader, the box typically includes:
- Ingenico terminal unit
- Power adapter and cable
- Communication cables (Ethernet, USB, or serial depending on your model)
- Paper roll (for terminals with a built-in printer)
- Setup manual or quick-start guide
Ensure all components are present and undamaged before proceeding.
Step 1: Connect to Power
Plug the power adapter into a wall outlet and connect it to the port labeled “Power” on your terminal. Most Ingenico credit card terminals will boot automatically once connected.
If your terminal has a battery (like the Ingenico Move/5000), it may take a few minutes to charge before powering on. Make sure the battery is properly seated in the compartment.
Step 2: Connect to the Network
Ingenico terminals support various connectivity methods, including:
- Ethernet (LAN): Plug the Ethernet cable into your router/modem and the terminal’s Ethernet port.
- Wi-Fi: Navigate to settings on the terminal and select a secure Wi-Fi network. Enter your password when prompted.
- Cellular (GPRS/4G): Insert the provided SIM card (if applicable) and follow on-screen instructions to connect to the mobile network.
- Bluetooth (for paired devices): Use the Bluetooth menu to connect the terminal to a compatible POS system.
Stable connectivity is crucial, as the terminal must communicate with the payment processor in real time.
Step 3: Load the Paper Roll
For terminals with a built-in printer (such as the iCT220 or iWL255), you’ll need to load the thermal paper roll:
- Open the printer cover by lifting the latch.
- Insert the roll with the paper feeding from the bottom.
- Pull out a few inches of paper, then close the cover firmly.
- Tear off the excess paper using the terminal’s serrated edge.
Step 4: Software Configuration and Updates
Upon initial startup, your Ingenico terminal may prompt you to install or update its software. This includes:
- Firmware updates
- Security patches
- Payment application installations
Follow the on-screen prompts and ensure the device remains connected to the internet. Some configurations may be pre-loaded by your payment processor, but if not, you may need to contact your provider for specific software installation steps.
Step 5: Terminal Activation
Activation links the terminal to your merchant account. The activation process typically involves:
- Contacting your payment processor or merchant services provider.
- Providing the terminal’s serial number (usually located on the back or bottom).
- Receiving and entering an activation code or enabling remote provisioning.
Once activated, the terminal will undergo a quick reboot and automatically install your merchant credentials and configuration settings.
Step 6: Test Transactions
To confirm that everything is working:
- Insert, swipe, or tap a test card.
- Complete a small transaction (e.g., $1.00).
- Print a receipt if applicable.
- Void or refund the test transaction if desired.
Successful test transactions ensure your terminal is fully functional and ready for real-time customer payments.
Step 7: Optional Integration With POS System
If you’re using a POS system (like Square, Clover, or Lightspeed), consult your POS provider’s documentation for integration instructions. This often involves:
- Enabling external terminal support
- Pairing the Ingenico terminal via USB, Bluetooth, or Ethernet
- Installing any required drivers or plugins
Some POS systems require specific terminal models, so always verify compatibility beforehand.
Troubleshooting Tips
If your Ingenico card reader fails to connect or activate:
- Reboot the terminal and check all connections.
- Confirm internet access through your router or mobile signal.
- Ensure the terminal’s software is up to date.
- Contact your payment processor’s support team with your terminal ID and error codes.
Conclusion
Setting up and activating your Ingenico credit card terminal is a relatively straightforward process when approached step by step. From unboxing and connecting to the internet to activating and testing transactions, the key is ensuring proper network setup and software configuration. Once completed, your terminal will provide secure and efficient card payment processing for your business. Whether you’re using your device in a storefront or on the go, an Ingenico card reader offers the reliability and security modern businesses demand.


